Air Meter Replacement Parts Quick Order Guide

Product Code:

air-meter-repair-parts

In stock

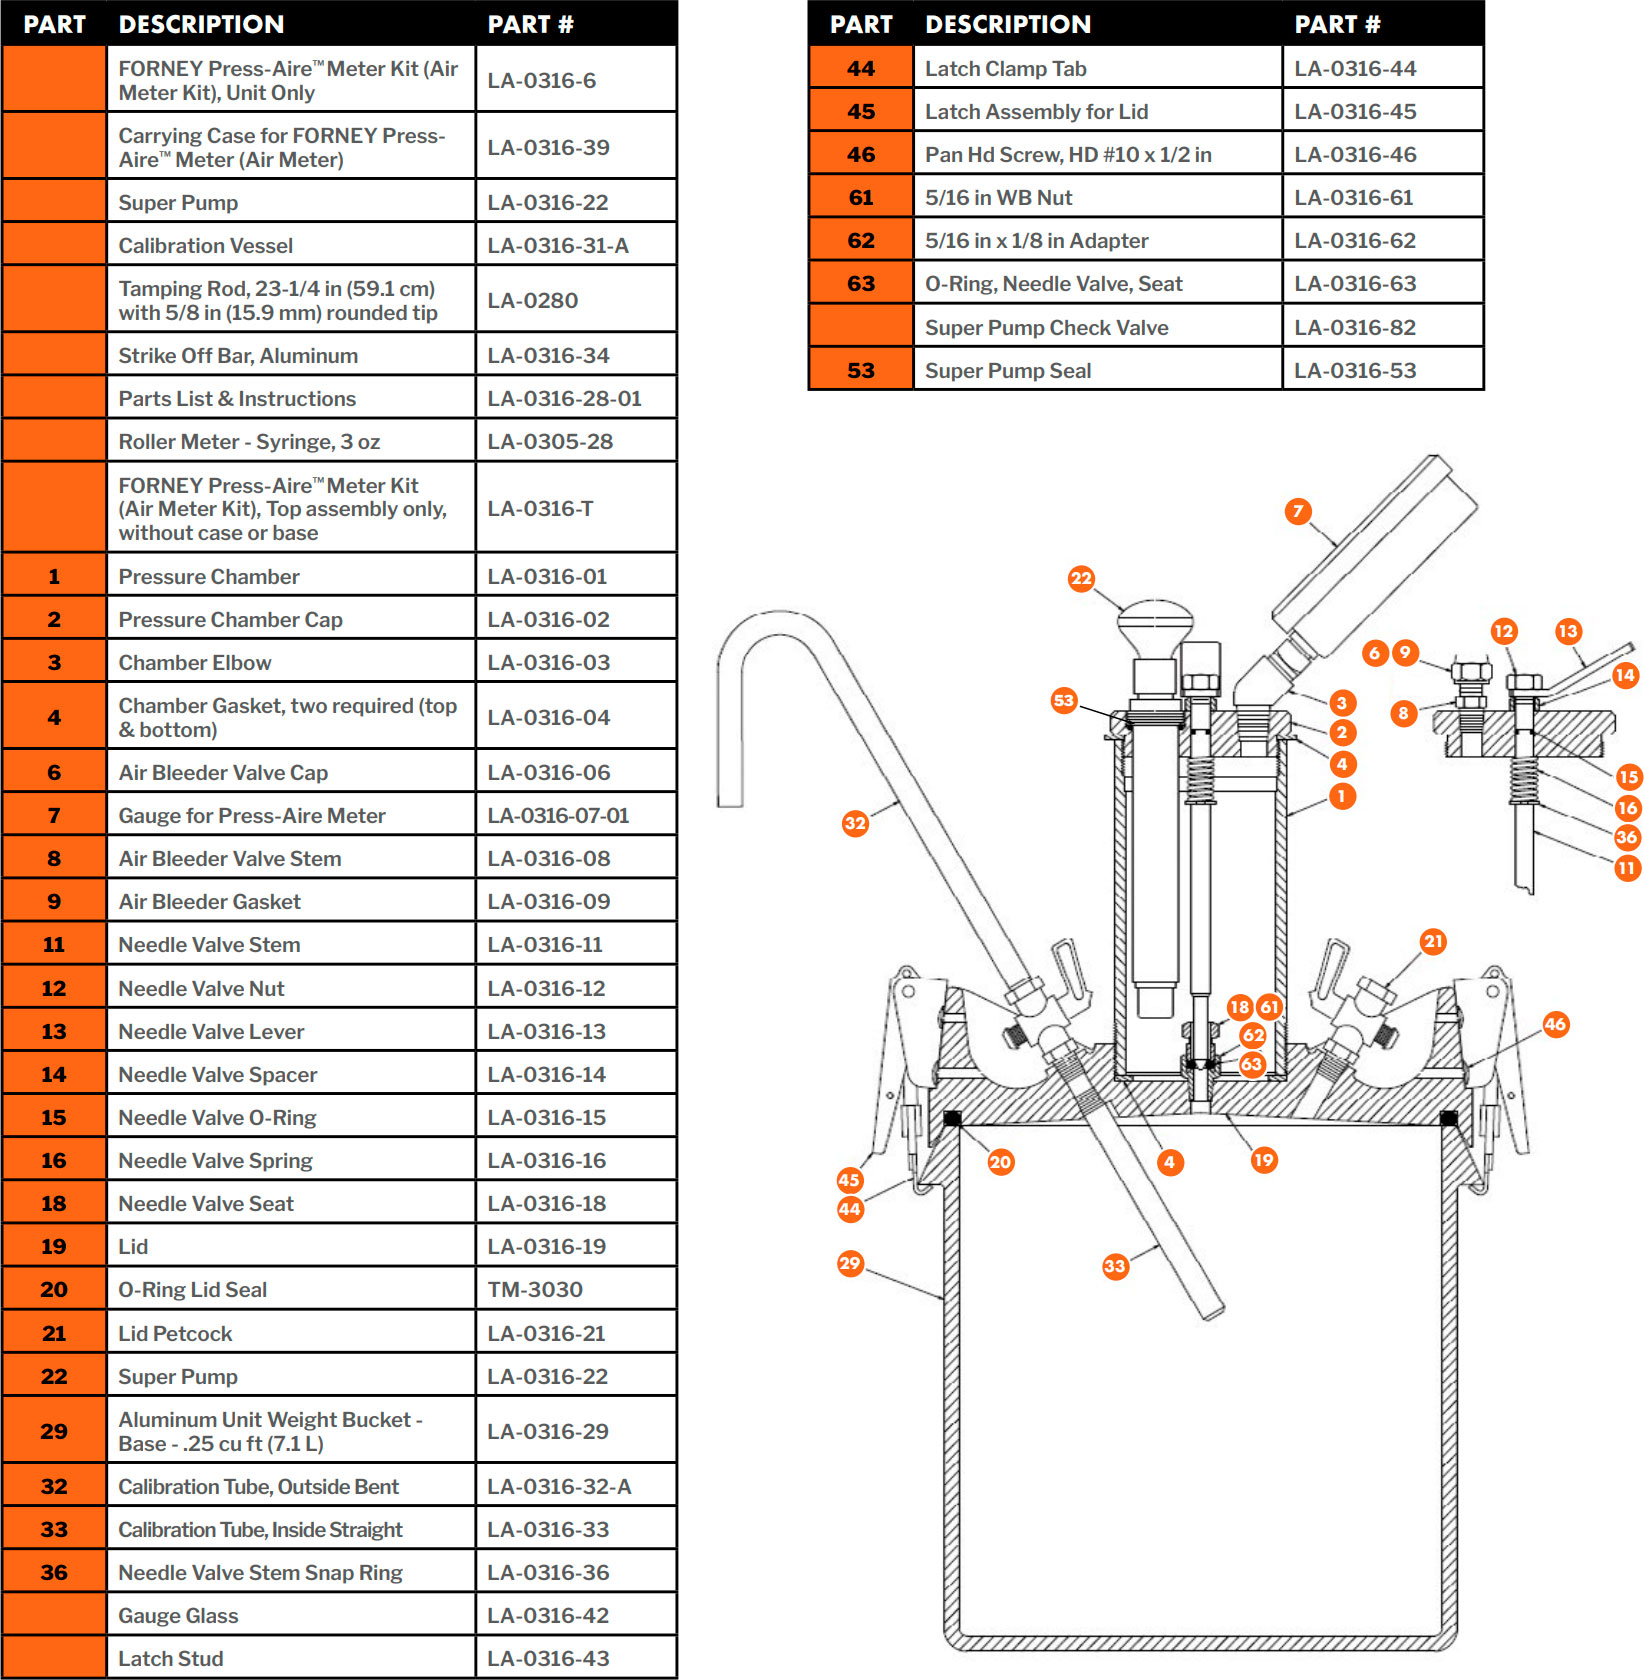
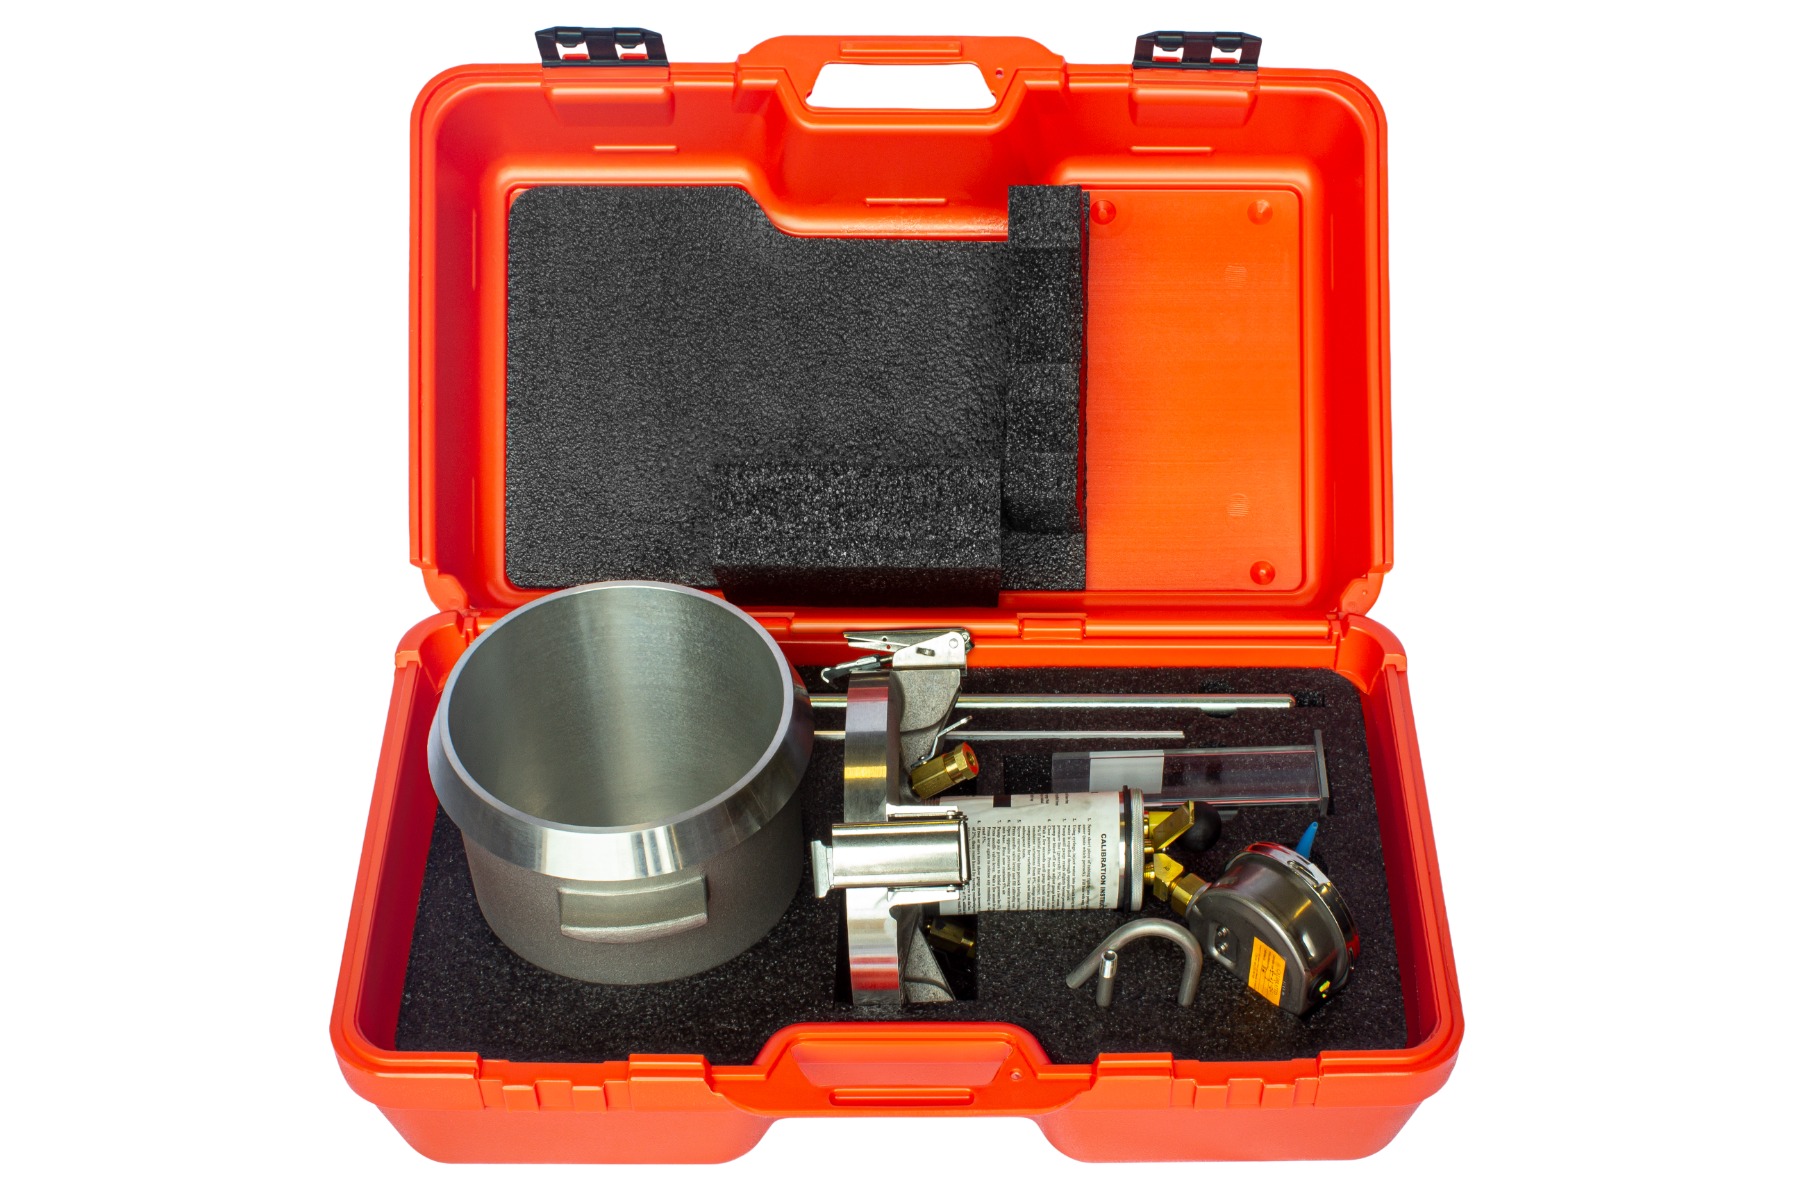
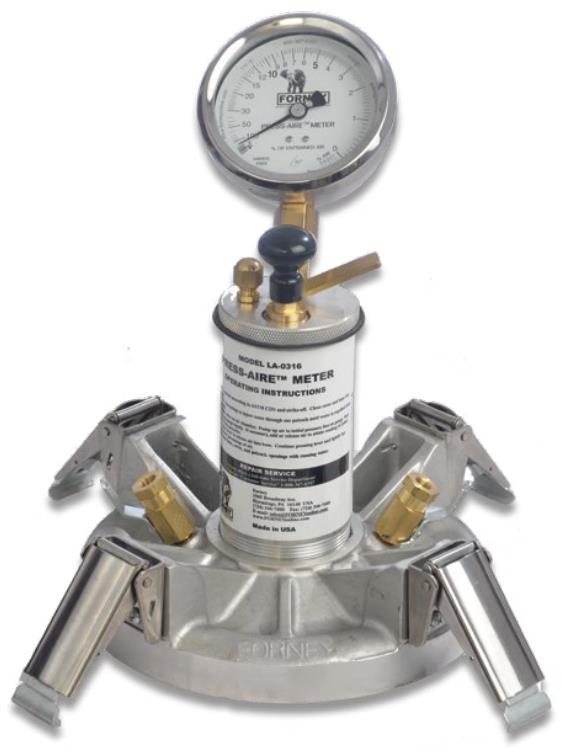
PRESS-AIRE™ METER KIT REPLACEMENT PARTS DIAGRAM

MODEL LA-0316

FORNEY'S KIT CONTAINS:

  • Syringe
  • Tamping Rod
  • Strike Off Bar
  • Calibration Vessel
  • Shipping Weight 39 lb (17.7 kg)
  • Calibration Tube, inside
  • Calibration Tube, outside
  • Carrying Case
  • Parts List
  • Instructions

CALIBRATION INSTRUCTIONS

  1. Screw short piece of tubing tightly into petcock hole on underside of cover (note which petcock). Fill base with water. Clamp cover to base.
  2. Using syringe, inject water into petcock having short tubing until water is expelled through opposite petcock.
  3. Pump until gauge reads slightly beyond preestablished initial pressure line (generally 3%). Wait a few seconds. If necessary, pump or bleedoff air to adjust hand to initial pressure line.
  4. Close petcocks. Press needle valve lever to release air in to base. Wait a few seconds until gauge hand stabilizes. Gauge should read 0% if initial pressure line was correct. If two or more tests produce
    consistent variations from 1%, change initial pressure line to compensate for variation. Use new initial pressure line for subsequent tests.
  5. Screw curved tube into petcock having short tubing. Open petcock. Press needle valve lever and fill calibrating vessel.
  6. Open opposite petcock allowing water in curved pipe to run back into base. Base now contains 5% air.
  7. Pump up air pressure to initial pressure line (3%). Close petcocks. Press needle valve lever. Wait a few seconds for needle to stabilize. Press lever
    again to release any remaining air. Gauge should now read 5%.
  8. If two or more tests show gauge reads incorrectly at 5% air in excess of 0.2%, then reset gauge hand by turning recalibrating screw on gauge hand
    (older meters, screw is on dial face).
  9. When gauge hand reads correctly at 5%, additional
    water may be withdrawn in the same manner to
    check results 10%, 15%, 20%, etc. 

OPERATING INSTRUCTIONS

  1. Fill base with concrete according to ASTM C-231 and strike off. Clean cover and base rim; clamp together.
  2. Open petcocks. Use syringe to inject water through one petcock until water is expelled from opposite petcock.
  3. Close air bleeder valve on air chamber. Pump up air initial pressure line gauge. Wait a few seconds, tap gauge lightly. If necessary, add or release air to attain reading at initial pressure line. Close petcocks.
  4. Press needle valve lever to release air into base. Continue pressing lever and lightly tap gauge. Read direct percentage of air.
  5. Thoroughly clean base, cover and petcock openings with running water. 
Additional Info